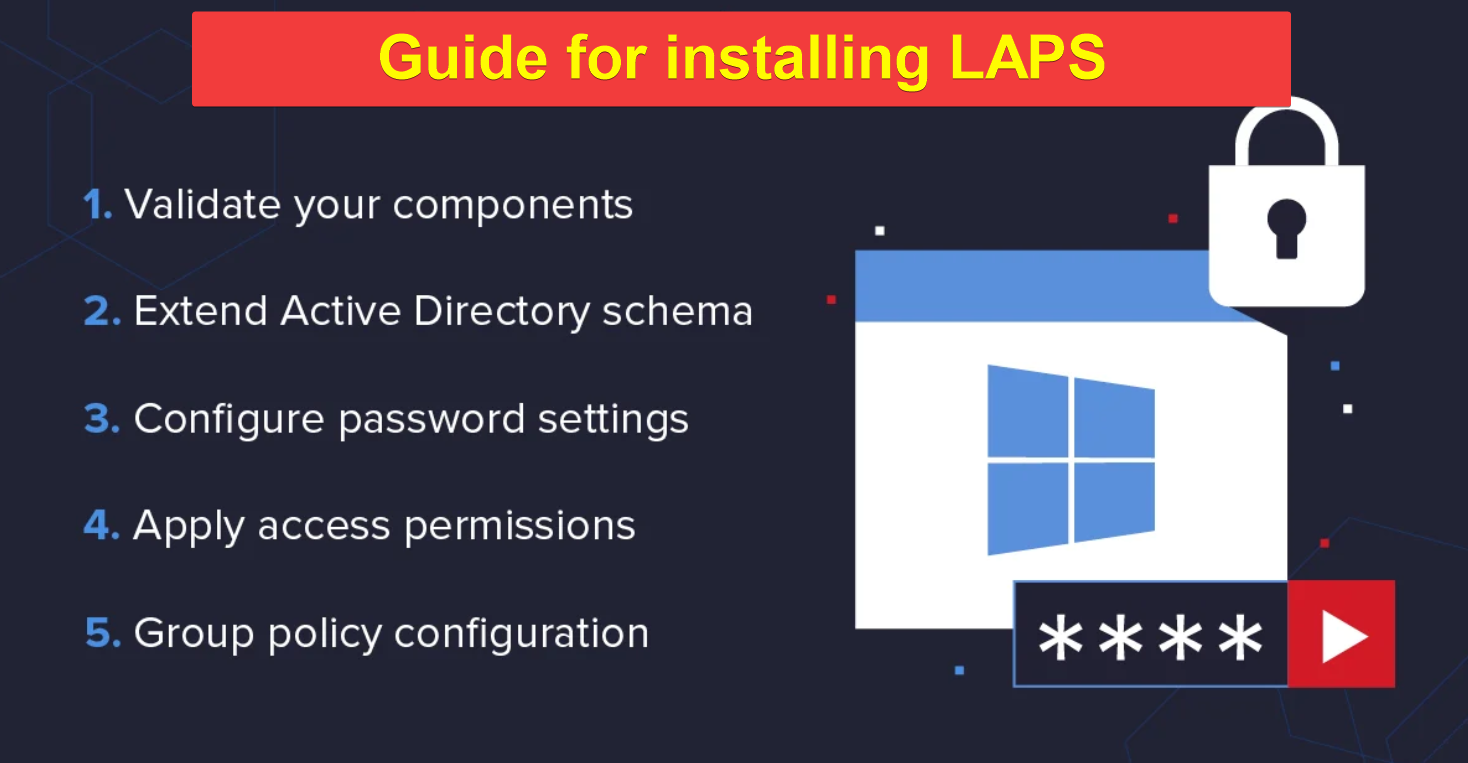
LAPS Installation / implementation (Local Administrator Password Solutions) – Guide
WHY use LAPS?
Windows Local Administrator Password Solution (LAPS) is designed to address the issue of poor management and security of local administrator passwords in a Windows environment. These are the main problems that LAPS solves:
- Weak and shared passwords: By default, local administrator accounts on Windows computers often have weak and identical passwords, posing a serious security risk. LAPS ensures that each system has a unique and strong password.
- Lack of password rotation: Local administrator passwords are rarely changed, allowing a potential leak to remain unnoticed for a long time. LAPS automates regular password rotation to minimize exposure to threats.
- Unauthorized access: Sharing local administrator passwords can lead to unauthorized access to computers within the network. LAPS restricts access to passwords based on security permissions.
- Password recovery issues: When a local administrator password is lost, recovering it can be time-consuming and complex. LAPS provides a standardized method for recovering local administrator passwords.
- Management complexity: Managing local administrator passwords on hundreds or thousands of computers can be challenging. LAPS simplifies this process through automation and centralized management via Active Directory or Entra ID.
In summary, Windows LAPS addresses issues related to weak passwords, lack of password rotation, unauthorized access, and management complexity of local administrator accounts, significantly improving the overall security of a Windows environment.
Please note! This guide focuses on on-premises systems connected to Active Directory. Hybrid and Entra ID Joined configurations are out of scope.
Introduction
The Active Directory schema is an essential part of the Active Directory domain in a Windows environment. The schema defines the structure and properties of objects stored in Active Directory, including users, groups, computers, and other directory objects. The schema determines what attributes (characteristics) objects can have and what classes of objects can be created.
In the case of Windows LAPS (Local Administrator Password Solution), it is necessary to update the Active Directory schema with new attributes. These new attributes are required to store information about the managed local administrator passwords, such as the last changed password and the password expiration date. Updating the schema allows these data to be stored in Active Directory in a standardized and secure manner, enabling LAPS to function effectively.
In short, updating the Active Directory schema with new attributes for LAPS is necessary to ensure the proper functionality and security of LAPS in a Windows environment.
Differences in functionality between Windows LAPS and legacy LAPS systems
The table below outlines the differences between Windows LAPS and Legacy LAPS in terms of available functionality, based on domain details. This comparison helps in determining which functionalities are supported.
| Domain Details | Clear-text Password Support | Encrypted Password Support (for domain-joined machines) | DSRM Account Management Support (DCs) |
|---|---|---|---|
| Less than 2016 DFL (Domain Functional Level) | Yes | No | No |
| 2016 DFL with one or more 2016 DCs | Yes | Yes | Yes, but only for DCs with WS2019 and later |
| 2016 DFL with only WS2019 and later DCs | Yes | Yes | Yes |
- Clear-text Password Support: Indicates whether the system supports storing passwords in clear-text. This is generally considered less secure.
- Encrypted Password Support (for domain-joined machines): Signifies the ability to store passwords in an encrypted format, enhancing security for domain-joined machines.
- DSRM (Directory Services Restore Mode) Account Management Support (DCs): Shows whether the system can manage DSRM accounts. DSRM is used for recovery purposes in Active Directory environments. Support in this context means the ability to manage passwords for these accounts, which is particularly relevant for Domain Controllers (DCs).
This table makes it clear that with advancements in domain functional levels and the deployment of newer Domain Controllers, there’s an improvement in support for encrypted password management and DSRM account management, indicating a shift towards more secure and comprehensive management capabilities in more recent setups.
Step 1. Active Directory schema update
The Active Directory schema is an essential component of the Active Directory domain in a Windows environment. The schema defines the structure and properties of objects stored in Active Directory, including users, groups, computers, and other directory objects. The schema determines which attributes (characteristics) objects can have and which classes of objects can be created. In the case of Windows LAPS (Local Administrator Password Solution), it is often necessary to update the Active Directory schema with new attributes.
These new attributes are required to store information about the managed local administrator passwords, such as the last changed password and the password expiration date. Updating the schema allows these data to be stored in Active Directory in a standardized and secure manner, enabling LAPS to function effectively.
In short, updating the Active Directory schema with new attributes for LAPS is necessary to ensure the proper functionality and security of LAPS in a Windows environment.
Windows LAPS
To update the Active Directory schema for the use of Windows Local Administrator Password Solution (LAPS), you need to fulfill a specific condition:
- Condition: Membership in the Active Directory Security group “Schema Admins” is required.
The PowerShell command to update the LAPS schema is as follows:
Update-LapsADSchema -Credential (Get-Credential) -Confirm $falseNote: The -Credential (Get-Credential) parameter is used when different credentials are needed to perform the update.
Verification
After updating the schema, you can verify that the new attributes have been successfully added by using the following PowerShell command:
Get-ADObject -SearchBase ((Get-ADRootDSE).SchemaNamingContext) -Filter * -Properties lDAPDisplayName | Where-Object { $_.lDAPDisplayName -eq "msLAPS-Password" -or $_.lDAPDisplayName -eq "msLAPS-EncryptedPassword" -or $_.lDAPDisplayName -eq "msLAPS-EncryptedPasswordHistory" -or $_.lDAPDisplayName -eq "msLAPS-EncryptedDSRMPassword" -or $_.lDAPDisplayName -eq "msLAPS-EncryptedDSRMPasswordHistory" -or $_.lDAPDisplayName -eq "msLAPS-PasswordExpirationTime"}
Added Attributes
The following table lists the attributes added to the Active Directory schema for LAPS, along with their corresponding schemaIDGUID:
| LDAPDisplayName | schemaIDGUID |
|---|---|
| msLAPS-Password | {c495e7e6-5e96-4f75-ad21-fd668a6f6b14} |
| msLAPS-PasswordExpirationTime | {fba802a2-1a19-4345-905f-4e83113fc792} |
| msLAPS-EncryptedPassword | {e1bebfdb-c4fa-448e-bc9c-fcde429ce314} |
| msLAPS-EncryptedPasswordHistory | {73ecbcc8-a4eb-49aa-8d8c-3ab90ed7806c} |
| msLAPS-EncryptedDSRMPassword | {8ade3d4c-cfc1-488a-879a-e7608e0259b7} |
| msLAPS-EncryptedDSRMPasswordHistory | Included in the msLAPS-EncryptedDSRMPassword attribute details |
These attributes are crucial for managing and securing local administrator passwords on domain-joined Windows systems. They enable the storage of encrypted passwords, their expiration times, and history, as well as special handling for Directory Services Restore Mode (DSRM) accounts, enhancing overall system security.
Schema Update for Legacy LAPS
To update the Active Directory schema for Legacy Local Administrator Password Solution (LAPS), you need to fulfill a prerequisite:
- Condition: Membership in the Active Directory Security group “Schema Admins” is required.
PowerShell Command for Schema Update
To perform the schema update, you can use the following PowerShell commands:
Import-Module admpwd.ps
Update-AdmPwdADSchema -Verbose
This process involves importing the admpwd.ps module, which is specific to Legacy LAPS, and then executing the Update-AdmPwdADSchema command to update the schema.
Verification
After the schema update, you can verify the addition of the new attributes by using the following PowerShell command:
Get-ADObject -SearchBase ((Get-ADRootDSE).SchemaNamingContext) -Filter * -Properties lDAPDisplayName | Where-Object {$_.lDAPDisplayName -eq "ms-Mcs-AdmPwdExpirationTime" -or $_.lDAPDisplayName -eq "ms-Mcs-AdmPwd"}Added Attributes
The schema update for Legacy LAPS adds the following attributes to the Active Directory schema, which are essential for managing the expiration and storage of passwords:
| LDAPDisplayName | schemaIDGUID |
|---|---|
| ms-Mcs-AdmPwdExpirationTime | 686f34a3-7aec-41ae-ade8-aebc89213129 |
| ms-Mcs-AdmPwd | 3872d834-36e0-4def-aa19-30b3f98fa13e |
These attributes enable the storage of password expiration information and the passwords themselves, which are critical for managing local administrator passwords on domain-joined systems securely.
Step 2. Setting up “Computer Self Permission”
Setting up “Computer Self Permission” for Local Administrator Password Solution (LAPS) is a crucial step in ensuring secure password management within your Windows environment. This process involves delegating the correct permissions to computer accounts, allowing them to read and update their own local administrator password autonomously, without administrator intervention. Implementing this feature enhances the security of local administrator passwords and minimizes the risks associated with unauthorized access.
Here’s how to effectively set up Computer Self Permission for LAPS:
Windows LAPS
Open PowerShell on domain controller use the following commands:
Set-LapsADComputerSelfPermission -Identity “<DistinguishedName>”Example:
Set-LapsADComputerSelfPermission -Identity 'OU=Servers,OU=Tier 1,OU=Admins,DC=sandbox,DC=lab'Legacy LAPS
For legacy LAPS open PowerShell on domain controller use the following commands:
Import-Module admpwd.ps
Set-AdmPwdComputerSelfPermission -Identity “<DistinguishedName>”
Example
Set-AdmPwdComputerSelfPermission -Identity 'OU=Servers,OU=Tier 1,OU=Admins,DC=sandbox,DC=lab'Step 3. Use Group Policy with LAPS
Using Group Policy to deploy Local Administrator Password Solution (LAPS) settings is a highly efficient and consistent way to ensure that local administrator passwords are securely managed across all your Windows computers. This method leverages the power of Active Directory and Group Policy to automate the configuration and enforcement of LAPS policies.
Here are the steps to apply LAPS settings to your computer systems via Group Policy:
Windows LAPS
- Open a management system, “Group Policy Management”.
- In the “Group Policy Object” node, create a new policy named “Windows LAPS”.
- Edit the Group Policy and navigate to this node:
- Computer Configuration -> Policies -> Administrative Templates -> System -> LAPS. Edit the following policies:
- Configure password backup directory
- Enabled
- Active Directory.
- Enabled
- Configure size of encrypted password history
- Enabled
- 3
- Enabled
- Do not allow password expiration time longer than required by policy
- Enabled
- Enable password encryption
- Enabled
- Password Settings
- Enabled
- Password Complexity
- Large letters + small letters + numbers + specials
- Password Length
- 20
- Password Age (Days)
- 30
- Password Complexity
- Enabled
- Post-authentication actions
- Enabled
- Grace period (hours):
- 4
- Actions:
- Reset the password and logoff the managed account
- Reset the password and logoff the managed account
- Grace period (hours):
- Enabled
- Configure password backup directory
- Computer Configuration -> Policies -> Administrative Templates -> System -> LAPS. Edit the following policies:
Legacy LAPS
NOTE! Before proceeding with the following, copy the files:
AdmPwd.admx and AdmPwd.adml From “C:\Windows\PolicyDefinitions” to the central policy store (sysvol folder).
Next steps:
- Open a management system, “Group Policy Management”.
- In the “Group Policy Object” node, create a new policy named “Legacy LAPS”.
- Edit the Group Policy and navigate to this node:
- Computer Configuration -> Policies -> Administrative Templates -> LAPS. Edit the following policies:
- Do not allow password expiration time longer than required by policy
- Enabled
- Enable local admin password management
- Enabled
- Password Settings
- Enabled
- Password Complexity
- Large letters + small letters + numbers + specials
- Password Length
- 20
- Password Age (Days)
- 30
- Password Complexity
- Enabled
- Do not allow password expiration time longer than required by policy
- Computer Configuration -> Policies -> Administrative Templates -> LAPS. Edit the following policies:
NOTE! These GPO settings will be ignored by machines using Windows LAPS. For transition purposes, systems can be put into “LAPS emulation mode”. To do this, add the following registry key:
HKLM\Software\Microsoft\Windows NT\CurrentVersion\Winlogon\GPExtensions{D76B9641-3288-4f75-942D-087DE603E3EA} DllName = C:\Program Files\LAPS\CSE\AdmPwd.dll
NOTE! This will apply the features of Legacy LAPS and eliminate upcoming new features of Windows LAPS.
Step 4. Link the Group policy
Back in the Group Policy Management Console, link the GPO you’ve edited to the OU that contains the computers you want LAPS to manage. This can be done by right-clicking the OU and selecting “Link an Existing GPO,” then selecting your LAPS GPO.
Step 5. DELEGATION RIGHTS FOR READING LAPS PASSWORDS
In a Windows environment using the Windows Local Administrator Password Solution (LAPS), it’s crucial to have precise control over who has access to stored local administrator passwords. Delegating rights to read these passwords using PowerShell offers a standardized and secure method to carry out this task. This chapter will guide you through the process of delegating rights to read LAPS passwords with PowerShell. This includes assigning specific permissions to administrators or other authorized users, enabling them to obtain the necessary information without unnecessary access to other sensitive data. By following this process, you can maintain and manage the security of local administrator passwords while simultaneously providing the necessary operational flexibility to consult these passwords when needed.
Follow the steps below to effectively delegate rights for reading LAPS passwords with PowerShell and ensure a secure and efficient management practice.
Windows LAPS
Use the following code in PowerShell:
Set-LapsADReadPasswordPermission -Identity “<DistinguishedName>” -AllowedPrincipals <Group Name>Example
Set-LapsADReadPasswordPermission -Identity 'OU=Servers,OU=Tier 1,OU=Admins,DC=sandbox,DC=lab’ -AllowedPrincipals "Helpdesk Admins"Verification
Use the following code in PowerShell
Find-LapsADExtendedRights -Identity 'OU=Servers,OU=Tier 1,OU=Admins,DC=sandbox,DC=lab'
Tip! Use a regular account with the following PowerShell command:
Get-ADComputer -Filter * -Properties msMCS-AdmPwd | Where-Object msMCS-AdmPwd -ne $null | FT Name, msMCS-AdmPwdWhen values appear here, the rights need to be corrected. The value “msMCS-AdmPwd” can also be replaced with “msMCS-AdmPwdExpirationTime”
Legacy LAPS
Use the following code in PowerShell
Set-AdmPWDReadPasswordPermission -Identity "<DistinguishedName>" -Allowedpriciples <"Users or Groups">Example
Set-AdmPWDReadPasswordPermission -Identity ‘OU=Servers,OU=Tier 1,OU=Admins,DC=sandbox,DC=lab’ -Allowedpriciples <"Helpdesk">Verification
Use the following code in PowerShell
Find-AdmPwdExtendedRights -Identity 'OU=Servers,OU=Tier 1,OU=Admins,DC=sandbox,DC=lab'Tip! Use a regular account with the following PowerShell command:
Get-ADComputer -Filter * -Properties ms-Mcs-AdmPwd | Where-Object ms-Mcs-AdmPwd -ne $null | FT Name, ms-Mcs-AdmPwdWhen the powershell commands return any values, the rights need to be corrected
Step 6. Auditing LAPS
This step focuses on LAPS Auditing, a crucial aspect of the LAPS management practice. Auditing provides the ability to monitor, record, and analyze activities and events related to local administrator passwords. It enables administrators to see who has sought access to these passwords, when it happened, and whether the access was legitimate or posed a potential security risk.
In this step, we will discuss the value of LAPS Auditing, cover its configuration and implementation, and outline best practices for monitoring local administrator passwords with LAPS. By thoroughly understanding how LAPS Auditing works and integrating it into your management processes, you can add an extra layer of security to your Windows environment and maintain the integrity of local administrator passwords.
Windows LAPS
Before activating LAPS auditing, it must be enabled on the organizational unit where the passwords are stored in the computer object. Once access to a password is attempted, an auditing event will occur, which is logged in the event log of the Domain Controller. Use the following PowerShell command to activate the auditing capability.
Use the following code in PowerShell:
Set-LapsADAuditing -Identity "<DistinguishedName>" -AuditedPrincipals "<User or Group>" -AuditType Success, Failure, NoneExample:
Use the following code in PowerShell:
Set-LapsADAuditing -Identity 'OU=Servers,OU=Tier 1,OU=Admins,DC=sandbox,DC=lab' -AuditedPrincipals "Authenticated Users" -AuditType SuccessNOTE! When an identity seeks access to the password, the following type of event ID will be logged:
- ID: 4662
- Source: Security Event Log
- OperationType: Object Access
- Properties to include: {e1bebfdb-c4fa-448e-bc9c-fcde429ce314} & {c495e7e6-5e96-4f75-ad21-fd668a6f6b14}
Legacy LAPS
Before LAPS auditing can be activated, it must be enabled on the organizational unit where the passwords are stored in the computer object. Once someone attempts to access a password, an auditing event will occur, which is logged in the Domain Controller’s event log. Use the following PowerShell command to activate the auditing capability.
Use the following code in PowerShell:
Set-AdmPwdAuditing -Identity "<DistinguishedName>" -AuditedPrincipals "<User or Group>" -AuditType SuccessExample:
Use the following code in PowerShell:
Set-AdmPwdAuditing -Identity 'OU=Servers,OU=Tier 1,OU=Admins,DC=sandbox,DC=lab' -AuditedPrincipals "Authenticated Users" -AuditType SuccessNote! When an identity seeks access to the password, an event of the following type will be logged:
- ID: 4662
- Source: Security Event Log
- OperationType: Object Access
- Properties to include: {3872d834-36e0-4def-aa19-30b3f98fa13e}
Step 7. Reading local administrator passwords (what local administrator password is in use)
In this chapter, we will discuss the steps to read local administrator passwords with LAPS. This process enables authorized administrators to access the unique passwords generated and managed by LAPS, providing them with the necessary access to computers for maintenance and troubleshooting while maintaining the security of the passwords.
Correctly performing this task is of great importance to ensure the security and efficiency of your Windows environment. Follow the steps below to safely and effectively read local administrator passwords with LAPS, while maintaining your organization’s security measures and procedures.
Windows LAPS
Use the following code in PowerShell:
Example:
Get-LapsADPassword -Identity mgmt.sandbox.lab -AsPlainText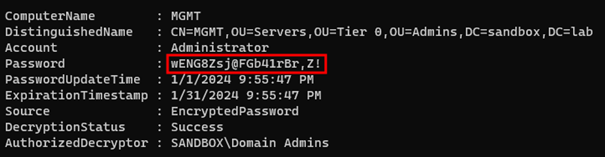
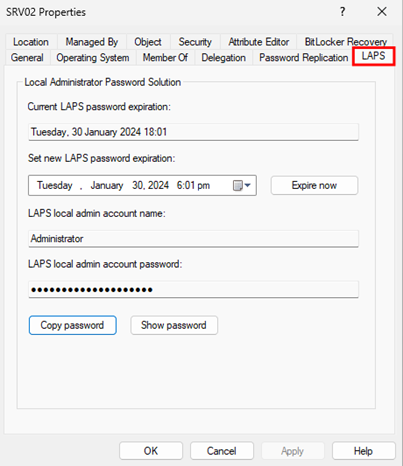
NOTE! The GUI interface can also be used; it’s integrated into Active Directory. Simply select a computer object, then navigate to the “LAPS” tab
NOTE! If this interface is not available, use the following command:
Sart cmd.exe (command prompt)
Type in the following code:
dism.exe /online /enable-feature /featurename:DirectoryServices-DomainController-Tools /allLegacy LAPS
Use the following code in PowerShell:
Example:
Get-AdmPwdPassword -ComputerName srv01 | fl
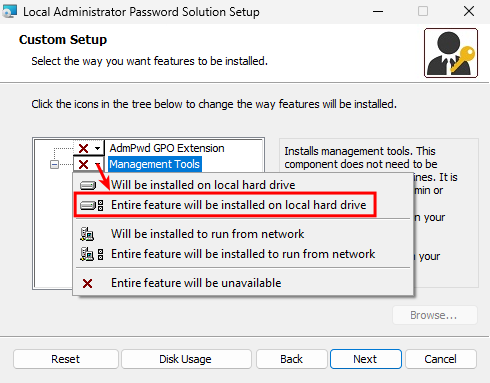
NOTE! The GUI interface can also be used; it is installed during the selection of the management tools.

EXTRA step 8. Installing legacy LAPS
NOTE! The steps below are for installing the Legacy LAPS feature. This installation is only necessary on Windows Server 2016 and lower.
Download the LAPS package: First, you need to download the LAPS package from the official Microsoft website. Make sure to select the version compatible with your server’s architecture (x64 or x86).
https://www.microsoft.com/en-us/download/details.aspx?id=46899
Start the file: “LAPS.x64.msi”.
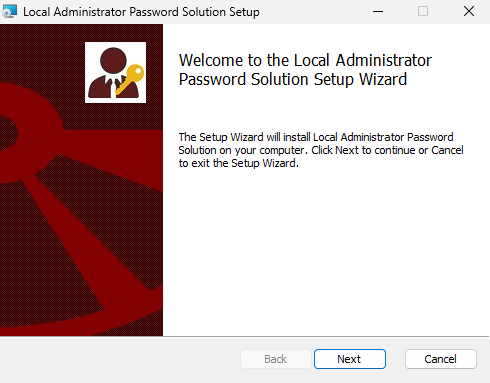
Click “Next”.
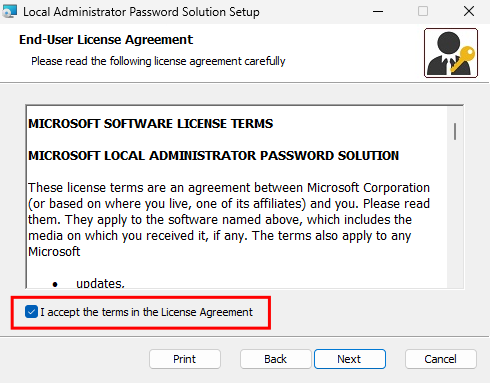
Select “I accept…” and click “Next”.
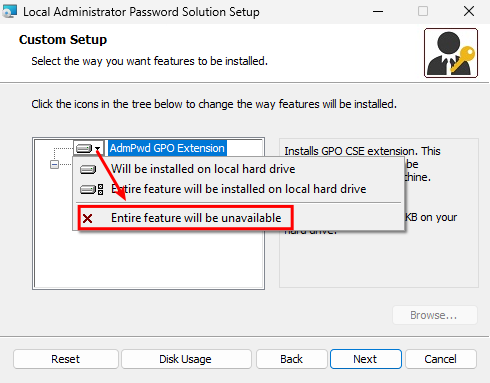
NOTE! When installing on a management system, do not install the “AdmPwd GPO Extension”; instead, select the option “Entire feature will be unavailable”.
The above option should only be used on machines that serve as target machines.
Select the above option on a management machine and click “Next”. After that, the installation will begin.

Click “Finish”.
Unattended installation
For an unattended installation of the Legacy LAPS tool, use the following command-line:
Open cmd
msiexec.exe /I <Path>\LAPS.x64.msi /qNOTE! Use the PowerShell module MSI Installer Module for remote installations.
Open powershell
Install-Module -Name InstallRemoteMSI
- Create a text file with all hostnames.
- Use the following PowerShell command for remote installation:
powershell
Install-RemoteMSI -MSILocalWorkingDirectory <Local Folder> -MSIFile LAPS.x64.msi -CompGPO
Or use group policy objects to deploy the MSI file to servers.