Guide – Enable IPv6 Exchange Online
By default, IPv6 is not activated in Microsoft 365’s Exchange Online for tenant configurations. If you’re looking to enable IPv6 for inbound email in Exchange Online, you might have noticed that there isn’t a straightforward option available to do so. Does this mean it’s impossible? Not necessarily. This article will guide you through the steps to enable IPv6 for Exchange Online within Microsoft 36
Point MX record to Exchange Online
Before you begin, make sure to update the MX records to point to Exchange Online. This step is crucial for the proper routing of your emails.
Check Exchange Online IPv6 inbound status
To verify the IPv6 inbound status for Exchange Online, follow these steps:
- Visit MXToolBox.
- Enter your domain in the provided field.
- Click on “MX Lookup” to proceed.
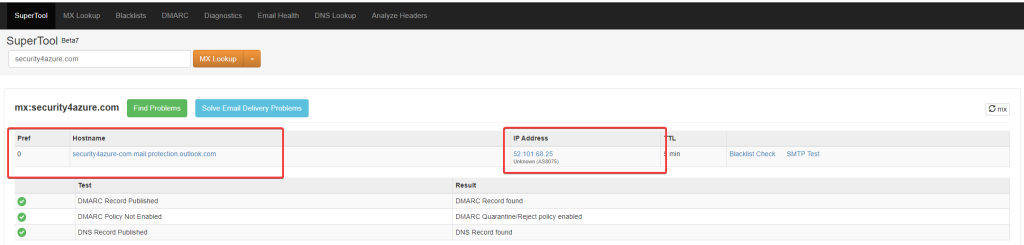
The screenshot indicates that while the Exchange Online MX record has been added, it is resolving only to an IPv4 address and not to an IPv6 address.
Add IPv6 to exchange online inbound
Before your organization can start receiving anonymous inbound emails over IPv6, an administrator must contact Microsoft support to enable this feature.
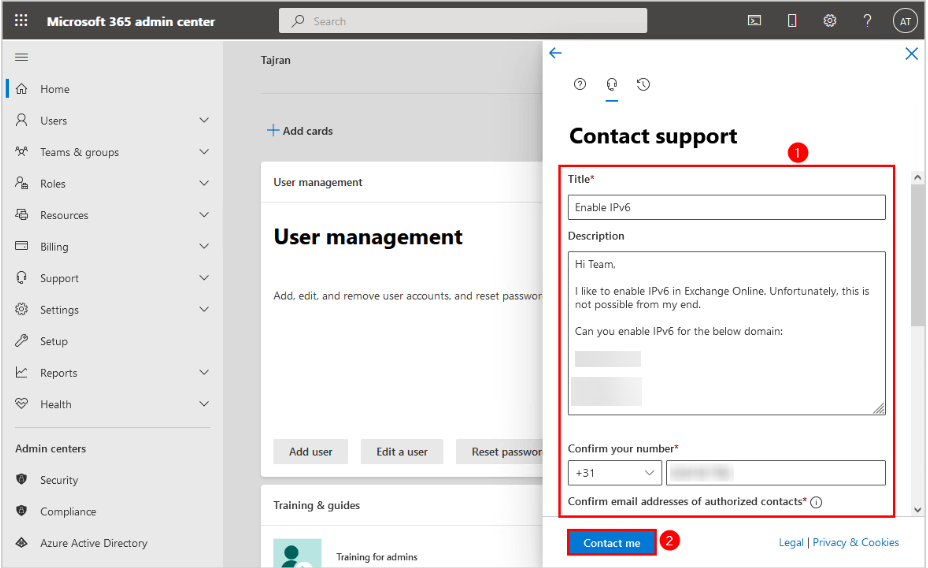
To create a service request in the Microsoft 365 admin center, follow these steps:
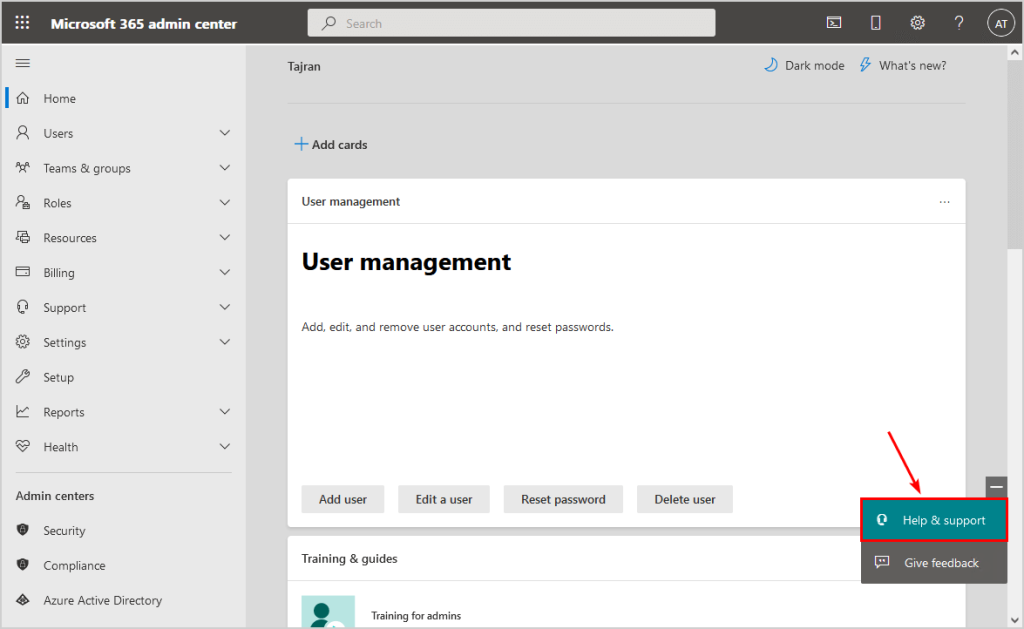
- Sign in to the Microsoft 365 admin center.
- Click on “Help & Support.”
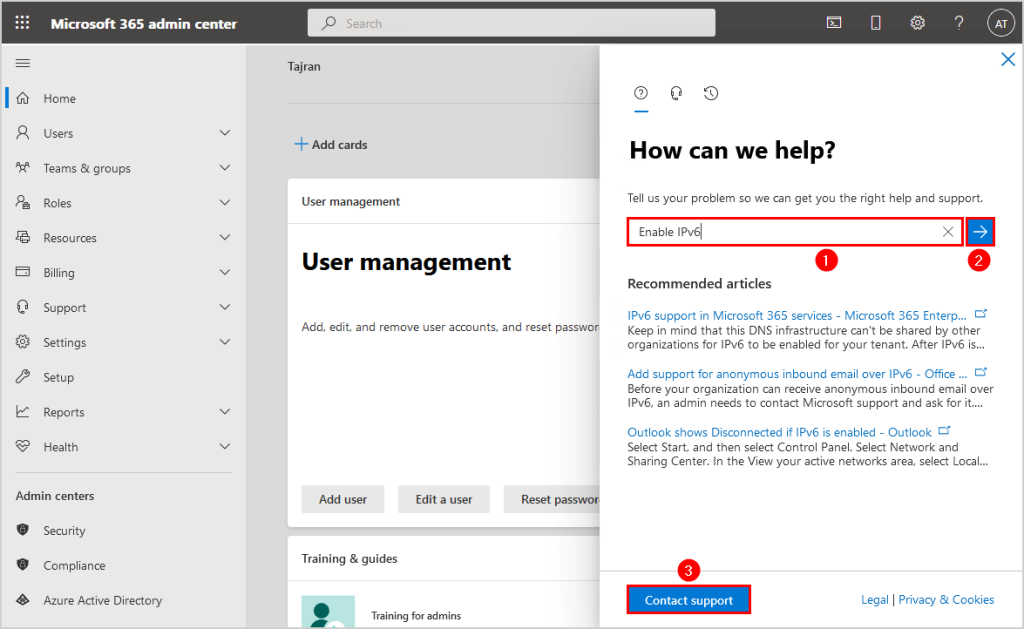
- Type “Enable IPv6” in the search or help field.
- Press Enter.
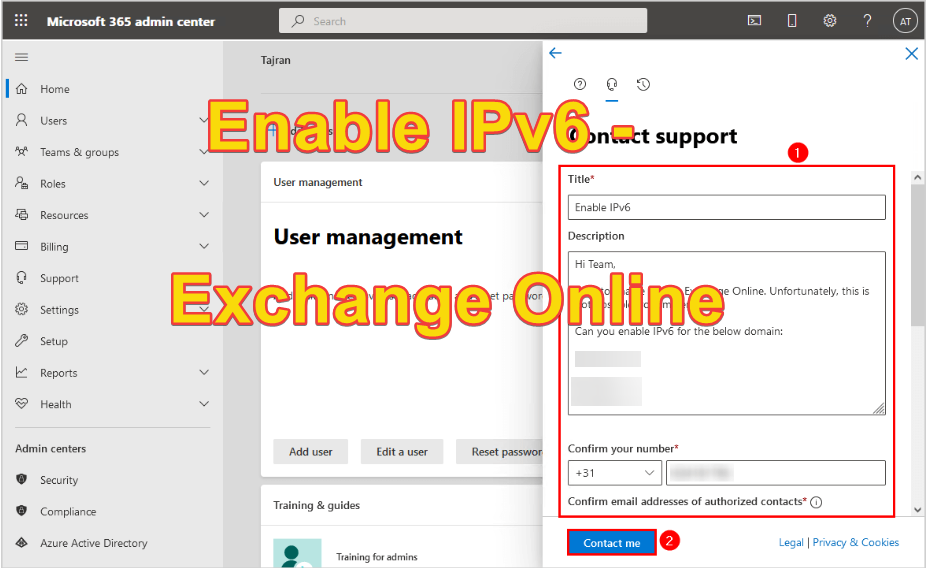
- Click on “Contact support” to initiate your service request.
- Fill out the support ticket
- Click Contact me
Wait for Microsoft to enable IPv6 for the domain in Exchange Online and send you a confirmation.
Verify Exchange Online IPv6 inbound
To verify Exchange Online IPv6 inbound status with MXToolBox, follow these steps:
- Go to MXToolBox
- Fill in the domain
- Click on MX Lookup
The below screenshot shows that the Exchange Online MX record is added and resolves both to IPv4 and IPv6 addresses.